

How To Plot A Bar Graph In App Designer
This browser is no longer supported.
Upgrade to Microsoft Edge to take advantage of the latest features, security updates, and technical support.
- Feedback
- Edit
Create a model-driven app system chart
- 2 minutes to read
Thank you.
In this article you learn how to create a system chart. System charts are organization-owned charts, which makes them available to anyone with access to read the data running the app. System charts can't be assigned or shared with specific app users.
-
Sign in to Power Apps.
-
On the left navigation pane, select Apps.
-
Next to the model driven app to which you want to edit by adding a chart, select ... (ellipses), and then select Edit.
-
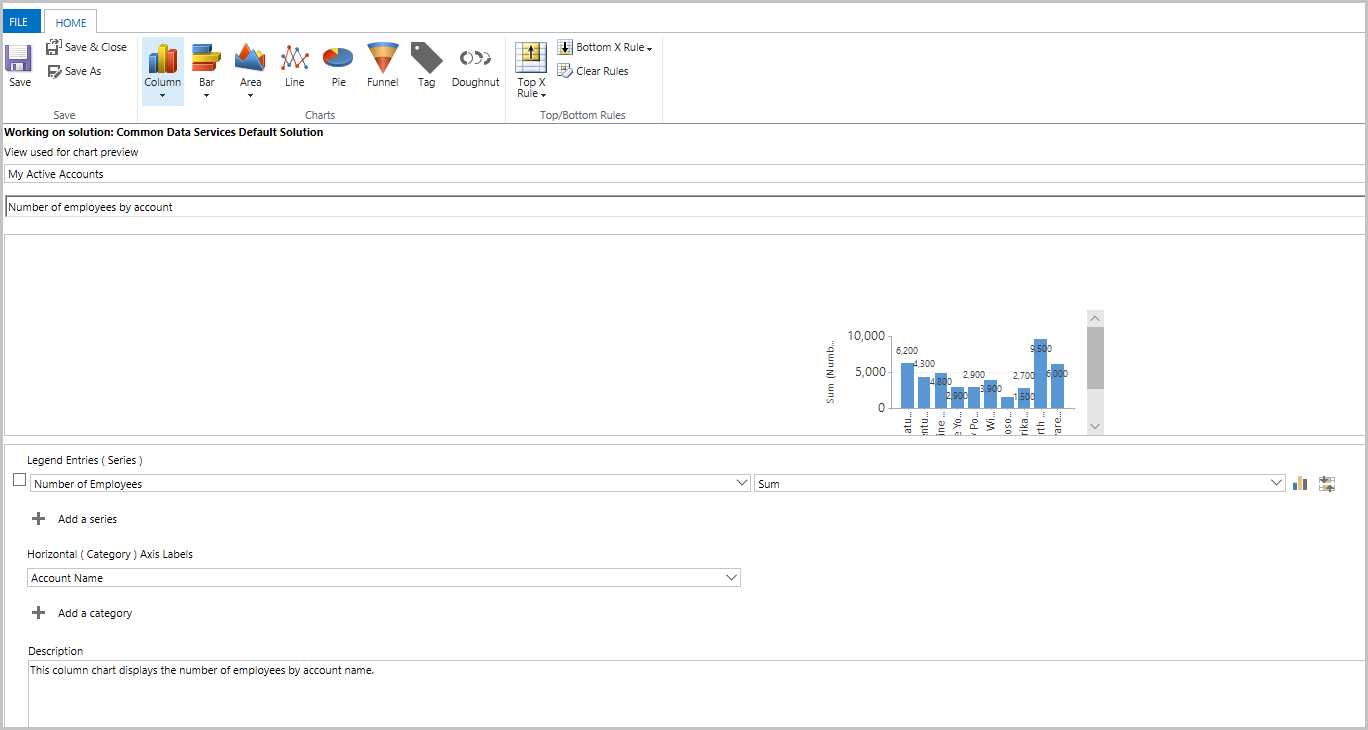
In the app designer, locate the table to which you want to add the chart, and then select the corresponding Charts tile. In this example, we add a chart to the Account table.

-
On the Components tab, select Create New.

A new window opens where you can create a chart.
-
Specify the type of chart, and how the data is displayed in the chart.
-
Enter the chart name, such as Number of employees by account.
-
In the Select Column dropdowns:
- In the Legend Entries (Series) dropdown list select a column, such as Number of Employees.
- In the Horizonal (Category) Axis dropdown list select a column, such as Account Name.
-
Add a description to identify the purpose of the chart, such as This column chart displays the number of employees by account name.
-
-
Select Save and Close.
The Number of employees by account chart is now displayed in the app designer list of charts available for the account table.
View your visualization in your model-driven app
Now that you have created your chart, you can use it to visualize account data in your app. Follow these steps to view your chart:
-
In the app designer, select Play.
The app launches.
-
On the left navigation pane, select Accounts.
-
On the command bar, select Show Chart.
The chart pane opens.
-
Select the chart selector, and then select Number of employees by account.

Your chart appears in-line with the data view.
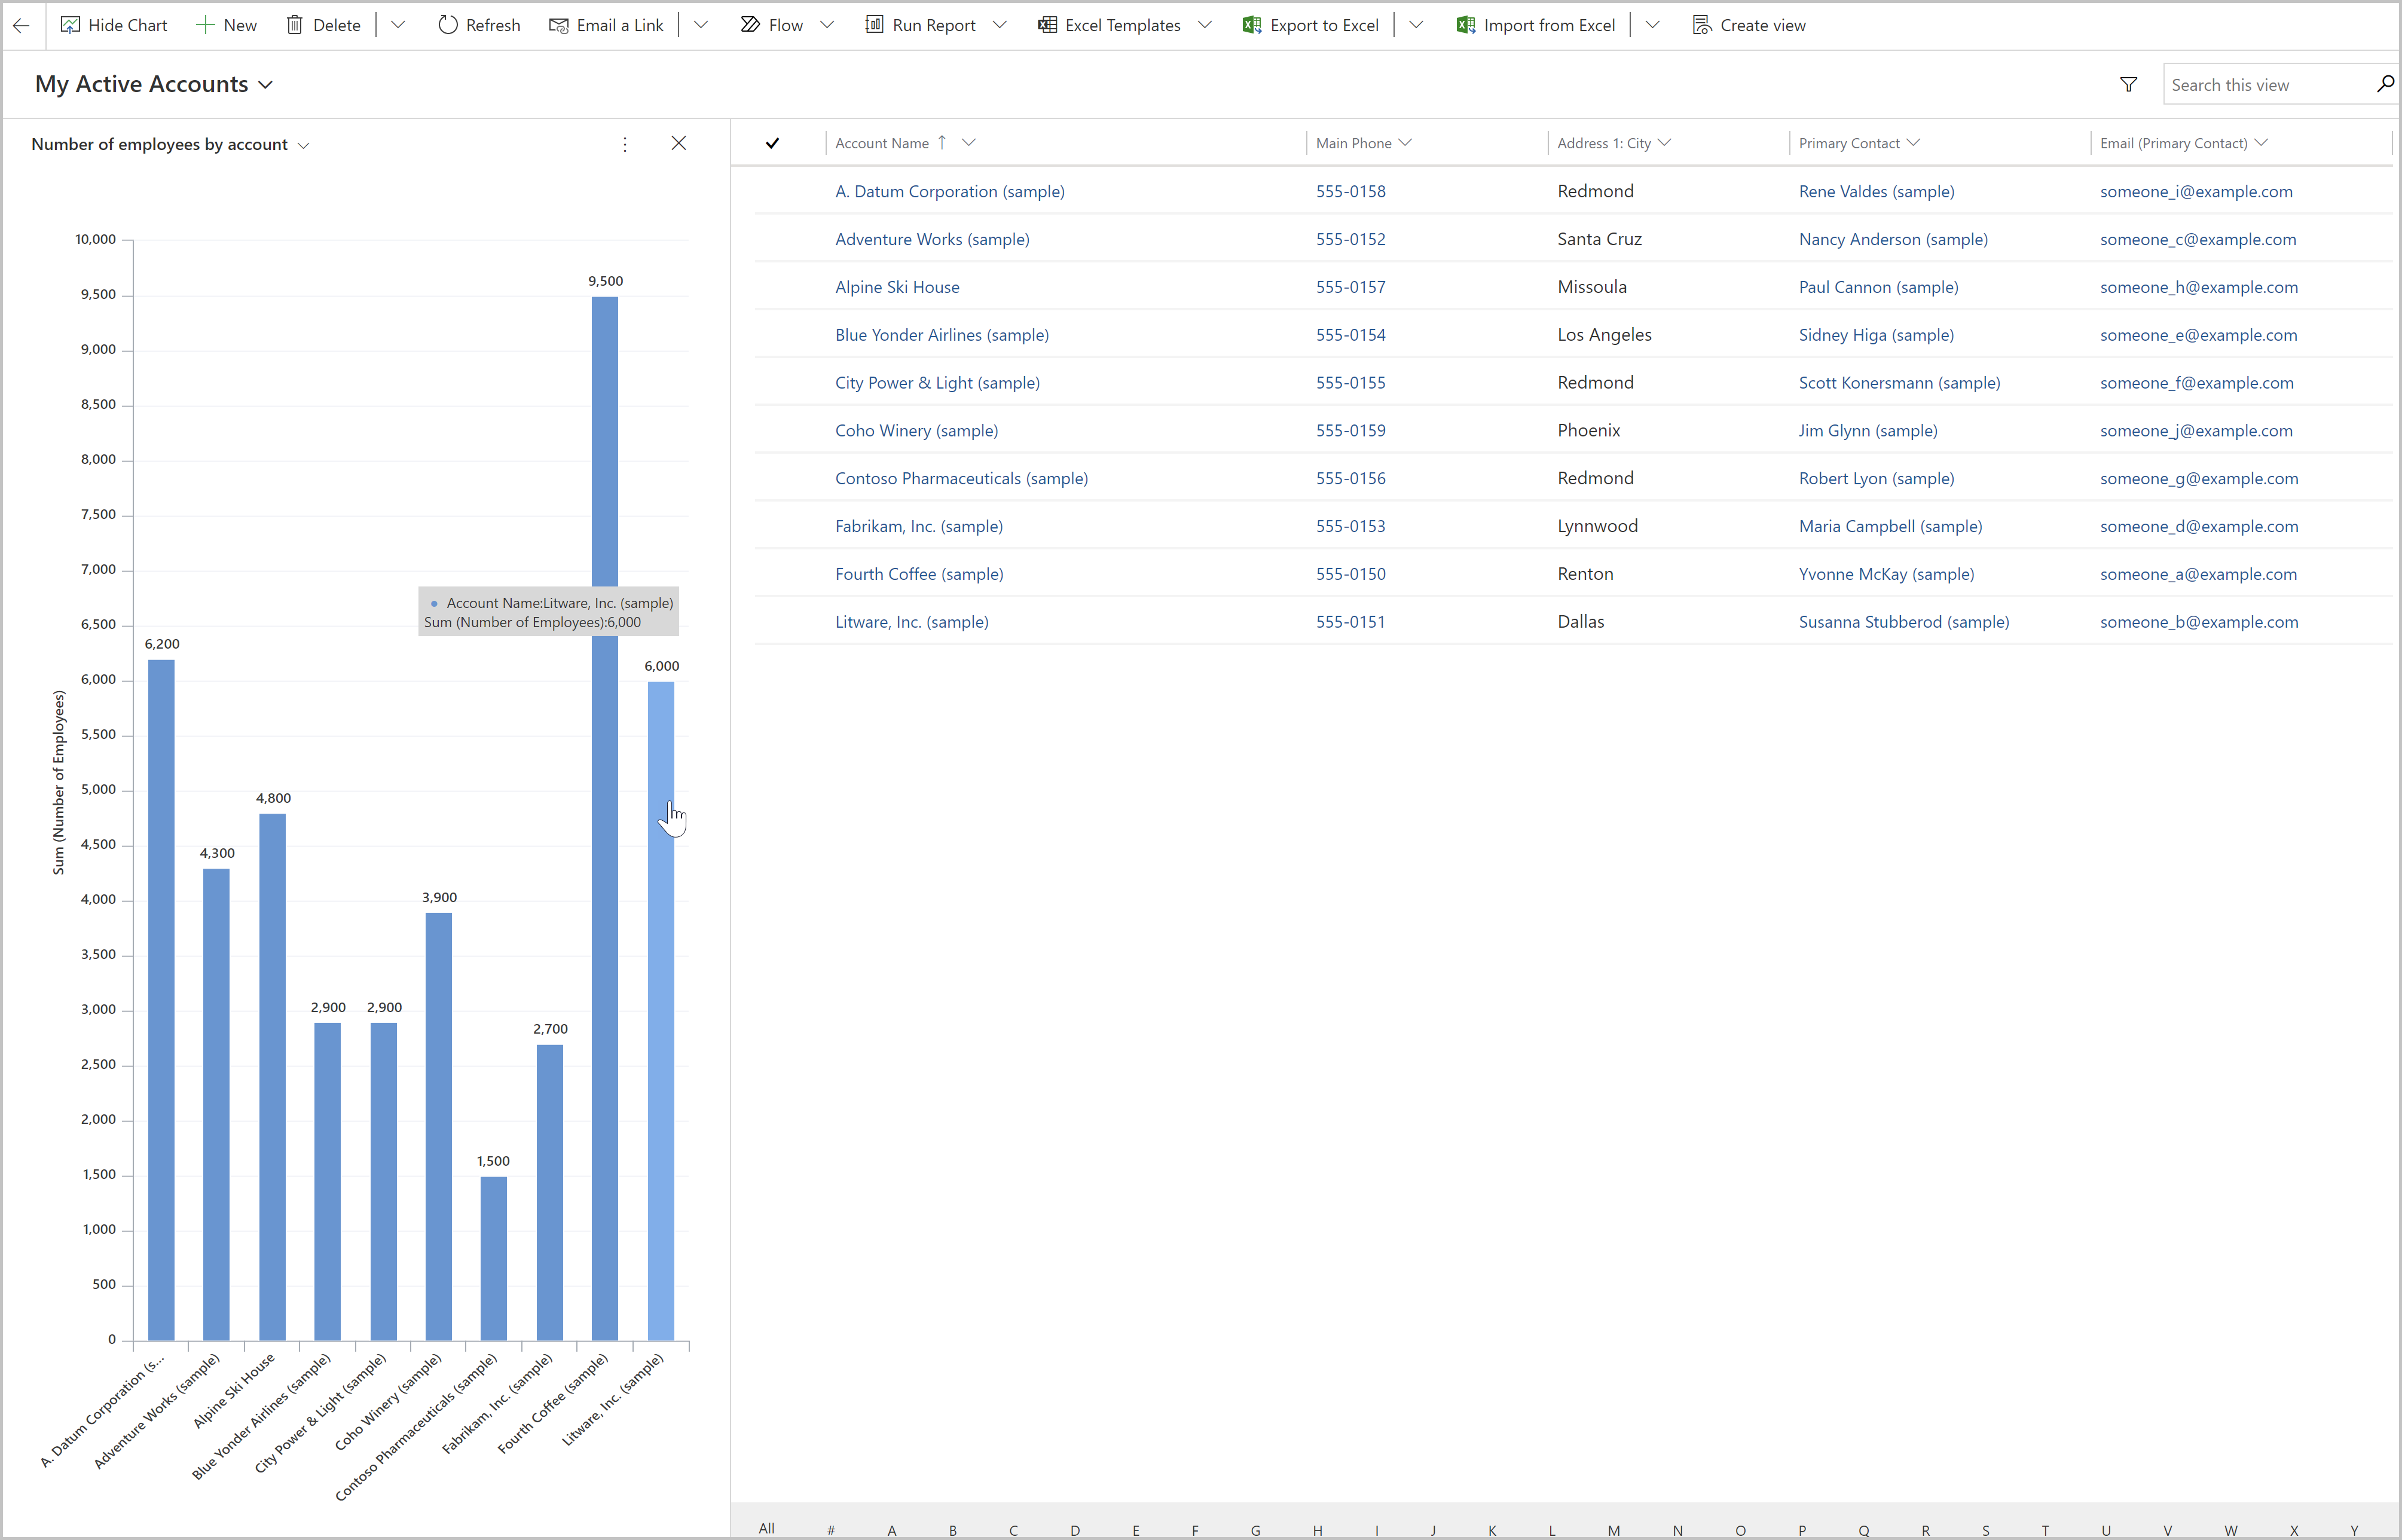
Use your chart:
- Select a bar on the chart to filter the data in the view.
- Refresh the chart to display other data by changing the view.
- Add the chart to a model-driven app dashboard. More information: Create or edit model-driven app dashboards
Known issue
In the chart designer, adding a order by on certain calculated columns are not supported and will cause an error. The calculated columns causing this are using another calculated columns, a related table column, or a local column on the table.
Next steps
Create or edit dashboards
Feedback
How To Plot A Bar Graph In App Designer
Source: https://docs.microsoft.com/en-us/powerapps/maker/model-driven-apps/create-edit-system-chart
Posted by: hutchesonmationdeed.blogspot.com
0 Response to "How To Plot A Bar Graph In App Designer"
Post a Comment